Need professional help?
Get in touch with an experienced landscaper today!

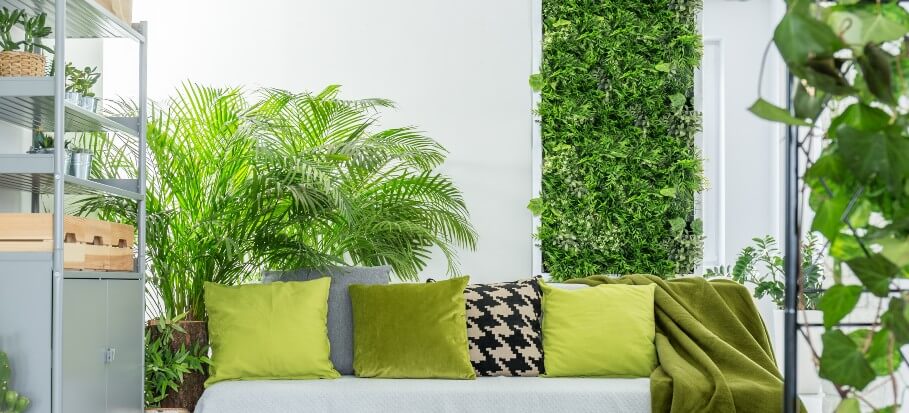
Also known as vertical gardens or green walls, living walls are aesthetically pleasing additions to your interior or exterior and they’ve been around for centuries. While they started gaining momentum after the 1930s, you can now see them in hotel lobbies, corporate offices as well as airport and shopping centre atriums. These types of decorations are not only eye-catching, but they can also soothe you and improve your mood.
What’s more is that if you choose, you can make your living wall indoors and even grow some veggies there. It doesn’t really matter whether you have a small apartment space or a larger garden, you might even consider adding a living wall to your commercial premises to offer your visitors a vibrant green space.
So if you:
Then this post is for you.
Before getting down to business, you need to figure out which plants are best for your indoor plant wall. To do so, it’s a good idea to determine how much potential light your plants will get. One question to ask yourself is how much artificial light will your plants be exposed to? Such light can be harsh on some of your plants. You will also want to consider the fact that most houseplants will require less light to partial shade.
Indoor Plants
In most cases, your plants will not be in front of a window in order to get full sunlight throughout the day, so some of the best indoor plant choices for you are the following:
Creating your very own DIY living wall is not a difficult task. You just need to be armed with the right tools and materials.
For tools, you’ll need:
Next, gather your materials, which include:
Once you’ve chosen your indoor plants and prepared your tools and materials, you’re now ready to create your own living wall planter indoors. So, without further ado, here are the steps on how to make a living wall.
Step 1. Cut your plywood to form a French Cleat
A French Cleat, although it may sound complicated at first, is just a way of securing heavier objects to walls. It has a moulding with a 30-45% degree angle at the top, which is then used to connect and steadily secure the main piece of furniture on top of it. Here, you’ll want to get your plywood and cut it down to a size of about four inches wide and two inches high. Create the 45-degree angle on your plywood and get ready to secure it. In the end, you will want to end up with two 45-degree angles, which will lock together.
Step 2. Select your wall and measure it
You will already have an idea of where you want to hang your indoor living wall. Ideally, you’ll want to have enough space of about two feet wide and three feet tall. Measure and mark this part of your wall. Another important thing to keep in mind is your flooring. For best results, choose a sturdy interior wall with linoleum or hardwood flooring underneath it so that cleaning up spills is easier later on.
Take the two plywood French Cleats from step one above and center them along the wall. The narrow end should be against the wall, while the angled side should be placed upwards. This will create a locking mechanism for attaching the main frame, discussed later on below. Make sure your French Cleats are straight by using a level and mark where you’re going to drill.
Step 3. Create the frame of your indoor wall
Create a rectangle with your boards. Firstly, line up two 36-inch long boards parallel to each other and then line up the 22 ¼-inch boards also parallel to each other. Make sure that every corner is flush against the next one. Fasten the frame together using glue and then screw in 2 ½-inch screws at the corners to keep the new structure steady.
Step 4. Attach the supports
The supports are ¾-inch in length and go along each corner of your rectangular structure. Make sure you pre-drill the holes, then add the 1 ¼-inch screws through the supports, and glue them together for a stronger hold.
Step 5. Create the wall’s floor using slats
Your first slat – or a strip of wood – should be lined up along the frame’s longer edge. Use a clamp to hold it in place. You should pre-drill holes at the bottom of your frame. Next, screw in the 1 ¼-inch screws and use glue to bind them more closely together. Do this for all the slats you have. Using a spacer between your slats will be a good idea for a more even effect. When everything has been attached, you can sand down any rough edges.
Step 6. Time to add the plastic liner
The basic structure of your indoor living wall is complete. Now it’s time to line it with your plastic liner. Lay the wooden rectangle flat down or horizontally and add the plastic sheeting on top of it. Use clamps to secure the sheeting along the edges and then staple all along the frame every two or three inches. This will prevent any accidental leaks.
Step 7. Follow this with the first layer of landscape fabric
Place the landscaping fabric over the plastic layer. Make sure it’s smoothed out and use the same steps for the plastic lining. In other words, use clamps to secure it and staple it in place evenly.
Step 8. Make sure you add the second layer of landscape fabric
You need to add the second layer of landscape fabric by stretching it over your frame. Ensure that it is taught around the edges and once stretched, flip the frame over. You then need to wrap the landscape fabric around the rest of the frame. Staple around it, ensuring that the corners are tucked in. Staple every two or three inches for a consistent look.
Step 9. Cut your plant slits and fill the frame up with soil
You’ll want to cut about three slits in your landscape fabric, while making sure you stagger them in different areas. Keep them around six to eight inches long. Once you’ve done this, scoop the solid in the living wall through these slits until the entire frame is full. Make sure not to over pack it with soil.
Step 10. Time to add your plants
Pick up the plants and shake out any excess soil and then plant them in the three large slits. You can add smaller slits in between, making sure there is enough space between them to give the plants an opportunity to grow later on.
Step 11. You’re now ready to hang your living wall
After adding the soil and plants to your living wall, it will become considerably heavier so you may want to ask someone to help you pick it up and adjust it in such a way that the French Cleats meet closely. Pay attention to even weight distribution and notice whether any plants come loose at this point. Make sure to give your new plants a lot of water the first time round, and thereafter, water them weekly for healthier growth.
It’s a given that your living wall will naturally have quite less soil in it compared to potted plants or those grown in your garden. This makes watering it a priority. Make sure you water your living wall regularly, on a weekly basis will do the trick well.
The plants at the bottom of the living wall will naturally get more water than those on top, so keep that in mind as well. You can also invest in an automated irrigation system that feeds water from the top to the bottom and then recycles what’s caught in the trough at the bottom back up to the top. This is a costlier option.
Fertilising your plants is essential to keeping them healthy. There are two options here. Firstly, you can mix fertiliser in your automated irrigation system or you can add it directly to your watering can when you water them. Bear in mind that the type of fertiliser, its strength and frequency of application will be determined by the types of plants you’ve chosen.
Pruning is essential as your plants are living, growing things. Prune dead or dying leaves or parts of the plant that might be rotting or fading away to stimulate new growth. If you’ve planted vegetables or edibles, make sure to harvest them so that you don’t have an overgrown wall.
Also, make sure to keep a lookout for weeds. Although it’s highly unlikely that this will be the case, it’s always a good idea to check for these and remove them. Finally, as mentioned above, your plants at the bottom might get too much water so you’ll want to consider switching them to the top position in order for there to be even water distribution and that they don’t live in overly wet conditions.
Want to skip the hassle of building and installing your very own indoor green wall? Well, you’re in luck, you can always get in touch with an experienced landscaper to do that for you. And we at Fantastic Services offer just that.
Our professional living wall installation is a highly customizable service that lets you choose the type of flowers and arrangement you want your wall “made out of”. And you also decide where the wall will go and how big you want it!
Get in touch with an experienced landscaper today!
Your plant living wall is an aesthetically pleasing and wonderful way to decorate your indoor space. Creating your living wall is not a difficult task and engaging yourself in such a DIY project will be a nice experience.
To create your living wall, remember these factors going forward:
Looking for a more “practical” living wall? Head over to our article and learn how to make a vertical vegetable garden!
Image source: Shutterstock / Photographee.eu


The only home improvement newsletter you will ever need!
We will never spam you. Pinky promise!
For more information, check out our privacy policy.


