Home Improvement

How to Hang a Picture on the Wall

Hanging a picture on the wall seems easy enough at first. Just hammer a nail in the wall and then hang the picture. Well, it’s not as simple as that. First of all, there are multiple hanging implements and not all of them would work for your project. Especially if the project is to have a beautiful gallery of many pictures in one place. 

And second, you need the right tools and the right technique. But, don’t worry, the Fantastic Services team is here to help. Just follow this easy guide and you’ll know how to hang a picture on the wall like a real pro.
You will find this article useful if you:

  • Have a picture or more you want to hang on the wall;
  • Wish to do it yourself.
Table of Contents:

Decide on a hanging method

The most important factor in choosing your hanging method is the weight of your picture. Generally, if the picture is less than 20 lbs, you could use a simple nail or a screw. If the picture is heavier than 20 lbs, you need a more durable hanging method – using either a toggle bolt or a spiral anchor.

The size of the picture is also important, as it may be the reason why you’d need more than one hook. The wall material could be why one would choose not to hammer nails or drill screws into the wall. Here are the general rules:


  • Small and medium pictures. A single nail or hook is enough for both small and medium-sized pictures.
  • Large pictures. Large pictures could require two or more hanging spots, not just because of the weight, but also to make sure they keep straight. These also require heavy-duty toggle bolts in order to make sure they stay on the wall.
  • Canvas prints. Canvas prints are extremely light, so you can attach them to the wall without any nails. You could use velcro strips which are not only easier, but they also won’t damage the wall in any way.

Pick a place

Choosing the place to hang your painting is not as easy as it sounds. You could use a helper that would hold the painting on the wall, while you examine whether it’s the right place. Find the centre of your painting and mark it on the wall. Once that is done, do a quick measure to determine the right height. Generally, the middle of the painting should be at eye level. Of course, everyone has a different eye level, so the standard is at about 160 centimetres. Mark this as well, and you’ll know where the centre of your painting will be.

For galleries 

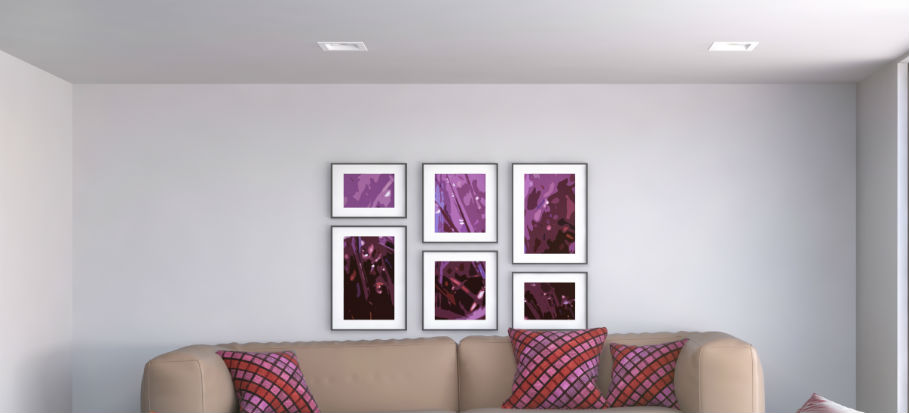
A gallery arrangement on a single or multiple walls can seem like a daunting task, but it is more time-consuming than effort-inducing. The pictures don’t have to form a perfect shape, but you should try to keep them evenly spaced from each other. To make this easier, cut a few pieces of paper that exactly match the size of each frame and lay them on the wall until you’ve found the shape you’re most satisfied with. Mark the centre of each painting with a pencil on the wall until you’ve found the right place for each.

If you’re hanging a big picture or a gallery over a bedside, it’s important to measure the height. For this purpose, lay on the bed and raise your arms against the wall. You need to make sure your arms won’t be able to reach the painting from a lying position.

Need a professional to hang your pictures?

Fantastic Services is here for you!

Add a valid postcode e.g. SE1 2TH
  • We're certified:

How to hang a picture on the wall

Once you’ve chosen your hanging method and you’ve picked the place to hang your artwork, it’s time to arm yourself with the proper tools and do the real work.

  • Find the horizontal and vertical planes. Use a pencil to mark where you’ll hammer, or drill your nail, or screw. To find the right place (or places), first, have your helper hold the picture to where you are most certain you want it to be. Once you have the right place, walk closer and make sure the painting is on eye level. This way you will have the right horizontal and vertical plane. 
  • Mark the place of the hanging implement. If you’re using only one nail/screw, find your mark through the middle of the painting. If you’re using two or more, measure the right space between them for maximum efficiency. Once that is done, you will have the marks where your hanging implement will be.
  • Install the hanging implement. If you had chosen to hammer a standard nail, go for it. Or you might have decided to drill a screw. As long as your wall allows these methods, you will be fine. If you’re going to hang a heavier artwork, use a toggle bolt. In that case, you would have to drill a hole big enough for the bolt to enter. Then you have to insert the bolt and use a screwdriver to tighten it against the wall. Now you’ve got a reliable hook for your painting.
  • Position the artwork on the hanging implement. Placing the picture against the bolts can be tricky since you don’t really see whether the hooks are caught on the bolts. It might take you a few tries, but make sure to let go only if you’re certain it’s hanging securely. 
  • Determine whether or not your picture is hung straight. Use a level on top of the picture to see whether the frame is hung straight. Adjust if it’s not.

How to hang a picture on the wall with hooks

This is a hanging method that doesn’t involve nails or drilling, aka it’s a lot more gentle towards your wall. We’ve said before that canvas prints can easily be equipped with velcro strips. However, those aren’t known to hold considerable weight. But there are special picture hooks that are able to hold a lot.

  • Choose the hooks. There are several types of hooks designed to be inserted into drywall without hammers or nails: Hercules Hooks (can hold up to 65 kg), Super Hooks (can hold up to 35 kg), Monkey Hooks (up to 15 kg), and Gorilla Hooks (up to 20 kg). None of them requires making a hole in the wall.
  • Install the hooks. Push the long, curved, tapered end of the hook through the drywall and position it so the small hook on the other end faces upright. Set it in place by pushing it in the rest of the way and you’re done.
  • Hang the picture. Once the hook is stable, you can hang the picture. For heavier and larger pictures, you might have to use two or more hooks. For that, measure the weight of the frame and use a pencil to mark the right place on the wall. Then do the same installation.

Visit the main website for price rates on our professional handymen!

Takeaways

  • Hanging a picture or multiple pictures requires good planning;
  • The hanging methods depend on the size and weight of the picture, as well as the type of the wall;
  • You can always rely on professionals to hang the picture for you.

Now that you know how to hang a picture on the wall the right way, you can start your endeavour and wow your guests with your original decoration ideas. If you only have the ideas, but not the desire to work on them, don’t worry – the Fantastic Services team is here to help. You can reach our professional handymen and they’ll do the job for you.

***

Are you a DIY enthusiast that frequently works on home improvement projects, one of which is hanging your own pictures? Tell us in the comments how you did it!

Image source: Interior Design/shutterctock.com

3.5 2 votes
Article Rating
Subscribe
Notify of
0 Comments
Inline Feedbacks
View all comments
0
Would love your thoughts, please comment.x
()
x