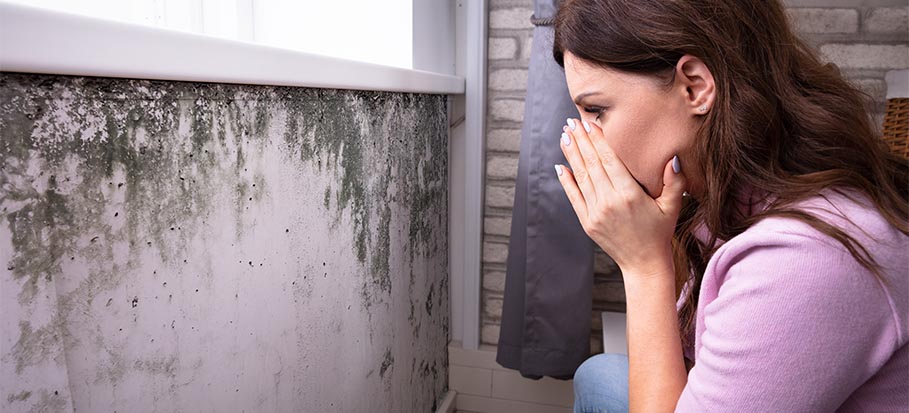
When it comes to unwanted situations at home, there’s probably nothing any homeowner or tenant dislikes more than mould and mildew, especially if it’s located on the walls. Not only are the fungi unsightly, but they are also bad for your health and tend to spread very fast.
Fun fact: mould is found more often in newer homes, than in the old ones. Newer housings have tighter seals around doors and windows, which, in turn, causes more humidity and mould.
So, if you:
Found out that mould is growing on the walls behind some of your furniture;
Have coughs and colds for no apparent reason only when you’re at home;
Tried to clean the mould off the walls, but it still keeps coming back…
Then read along! In this post, we’ll show you how to treat mould on walls and wallpapers and give you a couple of helpful prevention tips to make sure the fungi never comes back.
What are the common signs of mould infestation?
You might be thinking that seeing the actual mould is in itself a sign enough, however, there are other alerts to look out for. These appear even before the mould and are far less apparent:
Peeling or cracked paint;
Dark or coloured spots on the wall – these might be dots or streaks;
Constant allergy attacks – if something keeps triggering your allergies, then, that’s probably mould, which you haven’t found yet;
A damp, musty smell – even if you can’t find mould, the smell is proof enough, that you have an infestation;
Bulging of painted walls – the sectors where the paint bulges, probably have higher levels of moisture;
Water damage – this can happen from floods, leaks from the upstairs neighbour, or leaks from a burst pipe. Whenever there is moisture in your home, you can be sure that’s the first place where mould spores will settle.
Before any fungi removal procedures take place, you need to know what you’re dealing with.
Mildew is a fungus which is either grey or white in appearance. Upon touch, it’s kind of fluffy or powdery and leaves a residue on your fingers. It grows on the surface of moist and warm areas.
Mould, on the other hand, is green, dark green and sometimes black. When you touch it, it feels slimy. This fungus grows underneath surfaces which have gotten wet.
How to test for mould
The easiest way to test whether your wall has mould, mildew or is just plain dirty is by using bleach. Dab a few drops on the area you suspect is mouldy. If the drops become lighter after several minutes, it’s mildew. If not, it’s just dirt.
Mould growth on walls can be attributed to factors such as humidity, condensation and leaks. Mould bacteria is always around in the air, however, it will only start to grow on a wall when one or all of these factors are present.
Humidity – Rising humidity levels can occur due to various reasons. Some examples include: drying your clothes indoors during the winter, leaks in guttering or leaks inside the wall after intense rainfall, lack of ventilation. Even your HVAC system can cause issues. Intense humidity can form small puddles of water on your floors, which in turn will become a food source for more mould.
Condensation – When moist air comes in contact with a cool or cold surface such as a wall or window, tiny drops start to appear. This is the actual process of condensation and it can happen not only on cold surfaces but also in corners of rooms and behind furniture. Basically places where the air is always still.
Leaks – If you happen to notice a mouldy patch on a wall which keeps recurring, then you probably have a leak inside the wall either due to faulty gutters or a broken pipe.
Rising damp – Rising dampness doesn’t happen too often, however, if the other factors are not present and you still have mould, this might be the reason why. Rising damp always starts from the bottom of your internal walls and moves upwards. The foundation material (porous bricks, cement and mortar) absorbs water. Then it becomes permanently moist, which in turn becomes a perfect feeding ground for mould. If you see plaster crumbling or wallpaper starting to peel off somewhere, then you have a rising damp issue.
Blocked gutters – If your gutters are blocked by leaves, they won’t be draining water effectively, meaning some will start seeping into your property, causing mould. Cleaning your gutters regularly is a good way to prevent this.
How do you permanently remove mould from painted walls?
Before starting any cleaning of your walls, make sure you’ve prepared adequately:
Preparations
Buy protective goggles, a face mask covering your nose and mouth, and rubber gloves. Also, wear clothes with long sleeves to protect your skin from any spores. After cleaning, wash those clothes in hot water.
Close all doors to prevent spores from spreading to other rooms, but open the windows of the room where you will be cleaning.
Remove any curtains and decorative objects from the area where you will be cleaning. If you have radiators or heavy furniture that cannot be removed, cover them with plastic sheets and tape them (the sheets) down.
Place a towel on the ground below the wall you will be cleaning. The purpose is to catch any potential drips.
Follow these measures, regardless of whether you’re using eco-friendly or chemical mould removers, as mould spores get everywhere. Now, here’s how to treat mould on walls or wallpapers by using…
Despite being safe and eco-friendly, it’s still preferable to test the solutions listed below on a small spot before applying them on a substantial part of the wall. This way you can see how the paint will react to them and be sure that no damage will be done.
Vinegar
White, distilled vinegar is eco-friendly and doesn’t emit dangerous fumes. However, you might need to use it more than once on your wall, depending on how bad your mould problem is. To clean a mouldy wall using vinegar, you need to:
Pour white vinegar into a spray bottle. Don’t dilute it with water.
Spray the mould spot and leave it like that for about an hour.
Wipe away the sprayed mould using a cloth dipped in clean water. You can also use a scrubbing brush with firm bristles if some parts of the mould are harder to remove.
Dry the area by pressing an absorbent cloth onto it. The smell of vinegar will disappear in a few hours.
Baking soda is another great eco-friendly solution. And since it absorbs moisture very well, it’s a good fighter against mould. Here’s how to get rid of mould on walls using baking soda:
Mix one-quarter baking soda and two cups of water and pour the solution into a spray bottle.
Spray the mould-infested area and scrub it gently with a sponge.
Wipe the solution afterwards with a little bit of water.
Hydrogen Peroxide is less aggressive than bleach, stronger than vinegar and leaves no residue or fumes. It’s easy to find in any drugstore, just ask for some with a 3% concentration. Keep in mind that this chemical might lighten the surface you spray it on. To clean mould with Hydrogen Peroxide you need to:
Prepare a solution of 1 part hydrogen peroxide and 2 parts water in a spray bottle.
Spray the mouldy surface and leave the solution to do its job for about 10 to 15 minutes.
Scrub away the mould stains and debris.
Leave the surface to dry.
Chemical mould cleaners
Bleach
Not eco-friendly at all, but bleach cleans very well and, most importantly, kills the mould bacteria permanently. This is how you clean a mouldy wall with bleach:
Prepare a solution of one part bleach and 10 parts water in a bucket. Definitely dilute the chemical, because otherwise, it might damage the colour of your wall. Test first on a small area just to be sure.
Dip a rag into the solution, however, make sure it has not absorbed too much liquid. You don’t want the bleach to start dripping down your wall whilst cleaning.
Start wiping away the mould from the wall. As soon as one end of the rag becomes dirty with mould, change it to a different one. Do not use too much force while cleaning.
When no more mould is seen on the wall, press a dry cloth against the wet areas. The point is to soak up as much moisture as possible. Don’t rinse the wall with water, the point is for the bleach to remain on your wall, so it will continue to disinfect.
Leave the windows open, so you don’t inhale the chemical bleach fumes. Keep the room ventilated until the wall dries and the smell disappears.
There are also, of course, a number of specialised mould removers available in stores. As with all other cleaners, we advise you to test how they will react with your painted walls and follow strictly the application instructions provided on the label.
No, painting over the mould will not solve the issue. While paint might temporarily mask the problem, it does not treat the underlying cause – moisture and fungus development. Over time, the mould will grow again beneath the paint and spread, causing peeling, bubbling, and persistent stains.
If you want to eliminate the mould for good, you have to identify and take care of the things that cause the issue, such as leaks, condensation, or poor ventilation. Once that’s done, you can consider cleaning and then painting the affected walls with anti-mould or mildew-resistant paints, which contain fungicides to prevent future mould growth.
Now that you’ve ridden your home of the nasty mould, you should learn how to stop it from coming back:
Make sure there’s light in the room – Always leave your window blinds and curtains open when you’re at work, so the sunlight will enter your home.
Ventilate regularly – Every day before and after work, keep your windows open for at least 30 minutes, so fresh air can enter your property. If the weather isn’t too cold you can also keep your windows open during the entire day.
Control humidity – If there are still high levels of moisture regardless of what you do, then you might need to invest in a dehumidifier or at least moisture traps.
Fix any structural damage – As mentioned earlier, faulty gutters and leaking pipes can lead straight to mould growth. That’s why you should always fix these problems as soon as they occur.
Clean regularly – Even if you don’t necessarily have any leaks, you can still get mould if you hardly ever clean your home. The fungi can feed on plenty of surfaces including cardboard, wood and even cotton. The cleaner it is, the less of a chance for spores to grow.
Dispose of clutter – The more items you have at home, the harder it is for air to circulate. And as we know by now, still air is what mould loves. This doesn’t mean you should dispose of your nightstands or tables, but rather all the junk you keep in your closet and cupboard which you haven’t touched in several years.
Throw away infested items – Most old carpets, magazines and clothes which have gotten mouldy cannot be saved. It’s best to throw them away, so the spores wouldn’t spread further into your home.
Keep the bathroom door shut – Do this while showering so the steam doesn’t escape to your other rooms. Over time that same steam might absorb into your hallway walls in the form of the already mentioned rising damp.
Keep extractor fans clean – The extractor fans in your bathroom will lose power or become clogged eventually. When they can’t work at their full capacity, they can’t lead humidity away from your bathroom.
Don’t dry clothes inside – During winter, it seems to take ages for clothes to dry. No matter how tempting it might be to place them on your radiator, don’t. The moisture from the clothes will settle on the walls and ceiling.
The professionals we work with have years of experience in the cleaning industry and come fully equipped with cleaning tools and detergents. Your walls will once again be mould-free!
Mould growing on walls?
Book mould treatment with Fantastic Services and enjoy a perfectly safe home.