Laying laminate flooring is rather easy compared to other types of flooring. The boards snap into place and you don’t need mortar, grout or adhesives. The boards are not attached to the subfloor or underlayment but rather “float” on the ground.
It’s safe to say that most DIY enthusiasts are completely capable of fitting this kind of flooring by themselves. And this post will help you learn a few tricks on how to properly handle a laminate flooring installation.
So if you:
Are a homeowner;
Are a DIY person;
Have some questions about the installation process and the required toolset.
Then, read along and learn how to lay laminate flooring.
Benefits of laminate flooring
So, what are the pros of laminate flooring? Besides the relatively easy process of laying and fitting the individual planks, there are, of course, more laminate flooring benefits, such as:
Laminate is super durable – this flooring material is protected by a solid external layer and resin coating. As such, it is very resistant to scratches and impact, which makes it the perfect flooring for parents and pet owners. It could also often last as long as vinyl or any hardwood flooring.
Laminate is easy to clean – you can clean any spills off the laminate surface in a matter of seconds, and no stains will remain.
Laminate has a warranty – most manufacturers offer warranty protection against fading, moisture damage and stains.
Laminate is economical – it’s much less expensive to produce than other flooring materials and saves you money in the long run because you don’t have to change it for many years. You spend next to nothing to maintain it, as it doesn’t need wax or varnish for a great look.
Laminate comes in all kinds of styles – there is a pattern and colour for every taste, ranging from the traditional to something more exotic.
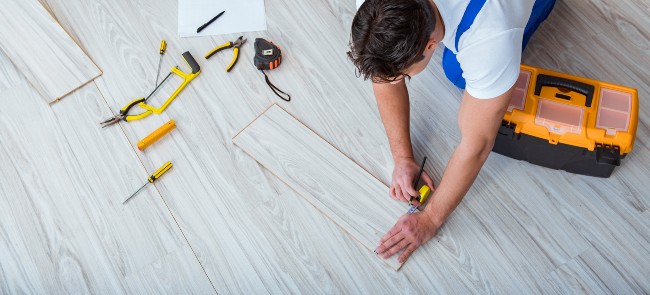
Albeit an excellent DIY project, you still need to be familiar with the tools needed to install laminate flooring. Some of these you probably have from other home projects, while others you will need to purchase or rent.
Rubber mallet – this kind of hammer delivers a softer impact than its metal counterparts and leaves no marks. That’s what makes it perfect when you need two laminate pieces to click together. A rubber mallet isn’t enough for this job, though. You will also need a…
Tapping Block – if you hit the tongue of the laminate board directly with the rubber mallet, you might damage the tongue. This is where a tapping block comes in handy. It’s shaped to sit tightly against the laminate. When you hammer it, it distributes the force from the hit evenly across the board.
Pull Bar – eventually, you run out of room to swing the mallet because you’d be too close to the wall. In this case, the pull bar is perfect. It’s a whole piece, but it’s bent at 90 degrees on both sides. One side, you attach to the end of the laminate board, the other you hammer until the piece fits in with the rest.
Tape measure – the most basic and essential measuring tool for any household. You will need this one to measure around an obstacle, such as a radiator pipe.
Combination Square – you might be wondering why you should have this item when you already have a tape measure. The reason is that with a combination square, you can mark square cutting lines. This comes in especially handy when you need to cut the ends of the boards.
Sliding T-Bevel – this small tool is made to measure angles different from 90 degrees and transfer them to a workpiece. You might need it if some of the neighbouring walls are at an angle larger or smaller than 90 degrees.
Hand-held drill with a spade bit – remember those pipes mentioned a little earlier? This drill and the right drill bit will allow you to bore precise and clean holes in the laminate boards. It’s the perfect tool for pipes coming up through the floor but will likely not be needed for other situations.
Jigsaw – a jigsaw equipped with a fine-toothed blade is ideal when you need to cut odd shapes from your laminate boards.
Spacers – all types of flooring materials, including laminates, contract and expand, due to changes in humidity and temperature. An expansion gap, created with spacers during the installation, will allow room for this movement.
Carpenter’s pencil – why this and not a regular pencil? Because a carpenter’s pencil makes thick and legible lines on all kinds of surfaces, including laminate.
Hygrometer – this is to measure the humidity of the room. This will become important later, just make sure you find one before the installation begins.
Wood takes up moisture from the environment it’s in and shrinks and expands a little bit. You will never see the difference unless the temperature extremes in the room are too drastic, but that doesn’t mean they don’t happen. Failure to acclimate your floorboards can even result in creaking noises.
If you already have this problem in another room, check our post how to stop creaking floorboards. Also there is no way to reverse this process. If your boards warp over time, the only way to fix your laminate flooring is by replacing them.
Now when you know why acclimatisation is essential, here are a few important things on how to do it:
Leave the laminate boards in the room for at least 48 hours. Once done adjusting, the boards will be uniformly conditioned, and their locking system won’t become compromised.
It’s important to leave them in the centre of the room and not next to a wall, since walls have different temperatures.
There must be no other construction activity in the room, because it will alter the temperature. For example, you’re doing a painting job and constantly keep the windows open. Then, the temperature will be different from what it usually is.
The temperature of the room should be between 7 and 30 degrees Celsius (64 and 86 degrees Fahrenheit), while the floor should be around 15 degrees Celsius (59 degrees Fahrenheit).
The humidity level should be between 25% and 70%. Use your hygrometer to figure out the humidity levels.
On a last note: if you skip the acclimatisation phase, you might not be able to use your warranty.
How to lay laminate flooring underlay
Some people consider installing a floor underlay as optional and that’s one of the common mistakes when installing laminate. The reality is, underlay is essential. It provides a soft cushion under the boards, making the surface nicer to walk on.
It also prolongs the life of your laminate boards, plus it gives additional soundproofing. Your downstairs neighbour will appreciate it. On a last note, it acts as an insulator, so it might even drive down your bills in the winter.
You should know that there are different types of underlay, depending on what subfloor you have. But you definitely need to install one, especially under laminate boards that are going to be laid on the following surfaces:
Concrete floors – you need an underlay with a built-in DPM. This will protect your laminate boards from moisture damage. An alternative is a high-damp membrane, but underlay is still the better option.
Underfloor heating system – in this case, you will need an underlay, which keeps the heat resistance within allowed tolerances and stops rising damp and condensation.
Plywood subfloor – fibreboard is best in this case, as it allows the wood to breathe and prevents moisture from becoming trapped. It’s also easy to install, which is never a bad thing.
So how to lay underlay for laminate flooring?
Prepare subfloor – clean the subfloor by sweeping any debris, then vacuuming to remove any leftover dirt.
Repair the floor – fill any cracks or holes. You don’t need to do it absolutely flawlessly, as most laminate underlays will even out the ground and accommodate for small imperfections.
Cover the entire area of the ground and join all the pieces together with tape.
Important:
The laminate should be laid at a 90 degree angle to the underlay.
Laminate flooring installation
Different laminate designs might have different fitting methods, so read the product’s instructions before starting work. You should take into consideration that you need to leave small gaps between the flooring and the wall. You will also have to cut each row’s first and last boards to make them fit better, that’s a must for a proper laminate floor installation.
How to start the first row of laminate flooring
When you have everything set and the underlay is in place, you can start:
Cut the first board. It should be around 1/2 of its original length.
Lay a row of planks along the wall. All ends must be connected correctly.
Put spacers between the first row and the wall to ensure there is a 10mm gap between the two.
Cut the last board of the row, so it would fit in the space left for it.
Snap it in place with the pull bar and hammer.
Start the next row with the remaining piece from the cut board. This will ensure your boards have a staggered appearance. Continue with the other rows in the same way you did with the first one.
Important:
Sometimes, you will find your wall not to be perfectly straight. What you have to do in this case is mark the outline of the wall on your first row of laminate boards and cut them in a way that fits that line.
How to lay the last row of laminate flooring
The last row can sometimes be tricky because it requires a long cut right across each board. Not to worry, though, because there is an easy way to do that.
Place the board over the place where it will be installed. Remember to put spacers between this board and the wall.
Get another piece of laminate and line it up against this one. This will ensure you have a perfectly straight line for cutting.
Draw the line on the board that needs to be cut.
Cut the board and install it with your pull bar and hammer.
Do this for all the other boards, until you reach the end of the row.
Hire professional laminate flooring fitters
If you feel like this task is too overwhelming or time-consuming, consider hiring professionals. Fantastic Services works with fully equipped and highly skilled tradesmen who can fit your laminate flooring in a stress-free manner.
Need laminate floor installation, or anything else done on your property?