Painting IKEA furniture will transform your boring average flatpack into a unique piece that you’ll surely value dearly. Just like you, there are hundreds, if not thousands, of IKEA lovers who also share the urge for beautiful and inspiring ideas for repainting IKEA furniture.
So, if you:
- Want to change up your IKEA furniture’s look;
- Own a piece of furniture in need of freshening up;
- Want to know how to prepare and paint your IKEA items,
Keep reading! This article will help.
Unfortunately, myths about peeling paint circulate the web and many people seem to ask the same question:
“Can you paint IKEA furniture?”– Yes, you can. But you need to prepare.
Luckily for you, we just so happened to write this blog post that will help you figure out how to paint IKEA furniture the right way.
Here’s what you will need to obtain before painting IKEA furniture:
- The piece of furniture you want to paint, of course.
- Fine grit sandpaper, preferably both 120 and around 200.
- Primer (there is much to be learned here).
- Paint (different options come with different know-how).
- Painting supplies (a brush, roller, paint sprayer, tarp, etc.).
- Polyurethane or polycrylic finish (depending on what you want to achieve).
Should You Paint IKEA Furniture?
Surely, this is question #1. Should you paint your unit prior to flat pack assembly or should you dismantle it after it has been already assembled and used for a good period of time?
The Answer:
It all depends on how much you are actually willing to invest. If you’re ready to put the extra dash of effort and chase the perfect finish, then you should definitely go with option #2 and take the flat pack apart. If you want to be efficient in terms of time – you could simply paint your flat pack as it is.
Whatever you decide, know this: the furniture must be well cleaned of any grime before you start painting.
Advantages
Regardless if the paint is rolled or sprayed, it will cost you far less hassle and nerves (in terms of painting itself) if you can paint your IKEA furniture prior to assembly (in its out-of-the-box state).
Disadvantages
Bear in mind that taking an already assembled flat pack unit apart may result in unforeseen damage to its parts and those are often hard to fix.
If you lack an air compressor, spray gun or both, try using foam mini-rollers instead. Make sure that you apply as many layers of coat as needed in order to avoid visible roller lines. Avoid brushes if possible, especially low-quality products. To achieve an even finish, you’ll have to cover quite a few layers of paint.
Painting assembled IKEA furniture
Painting a unit you’ve already put together has both pros and cons.
- A handy advantage is a fact that you only have to paint the visible surfaces. If you want the painting to be easier, then this is the option for you.
- To paint an assembled flat pack means that most parts will be reachable on both sides. Thus, you won’t have to wait for any to dry out before flipping each piece.
- This means you will finish painting your IKEA piece approximately twice as fast than you otherwise would if you were painting a dismantled IKEA unit.
- One of the obvious disadvantages of painting assembled IKEA furniture is that you’ll have a hard time reaching all corners. This holds the risk for an uneven paint finish.
- Another unpleasant downside to painting assembled IKEA units is the risk of affecting parts you do not want to paint, such as handles, hinges, mirrors, glass surfaces, etc.
Painting disassembled IKEA furniture
Here are both the pros and cons:
- Painting a dismantled unit will, without a shadow of a doubt, result in a smoother and better finish.
- At the same time, however, it will take the paint way more time to properly dry off. Not to mention the potential risk of causing damage to your freshly applied paint.
- The truth is that IKEA units were designed to be only built once. That’s why their dismantling and subsequent reassembly could weaken the joints, especially where the screws attach. The dismantling process may thus seriously hurt the overall integrity of the unit.
- Bear in mind that when first assembled, most people will over-tighten the assemblage which, in turn, will cause all the nuts and bolts to loosen their grip once the flatpack is taken apart.
Need your Ikea furniture delivered?
A team can go and get your Ikea furniture and deliver it straight to your doorstep.
How to prepare IKEA furniture for priming:
This article is meant to help you paint the most common IKEA units, such as Kallax (former Expedite), Lack, Malm, etc. All these flat packs are built out of laminated veneer chipboard, which is known to prevent paint from properly adhering to the surfaces.
The reason lies in the fact that most types of paint have a difficult time with smooth, non-porous melamine coatings, like the ones IKEA uses.
If you want to successfully paint IKEA furniture, you will have to be properly prepared. If you fail to properly prepare the surface prior to colouring it, the paint might simply chip off. That’s why it is crucial for you to do your homework right prior to applying the primer.
Steps to painting IKEA furniture:
STEP #1: Sand the flat pack.
Different IKEA units come with different surface coatings. What most flatpacks have in common is the vital need of sanding, also known as keying. Some pieces come with a smooth and shiny feel, while others have a sleek and glossy touch to them.
Never, ever neglect the prime and keying prior to painting laminate!
The goal of sanding is to give the primer a proper base to grab onto. Try something that will only roughen up the base, i.e. a P120 grade sandpaper would do just fine.
STEP #2: Clean the unit once sanded.
Removing leftovers is absolutely mandatory when sanding prior to painting. You do not want to have dust and other tiny particles in the way, otherwise, they may prevent the primer from adhering properly.
STEP #3: Apply the primer:
Sturdy adhesion can be tricky.
The main purpose of the primer is to act as an efficient base for the paint to stick to, regardless of the type of painted surface. If you fail to apply the primer properly, your paint will face the high probability of chipping off.
Painting via spraying will provide a decent result in terms of simplicity. Even though it’s quite efficient, the paint will almost always fail to adhere if you skip or neglect the primer.
Most products will deliver a whitish colour, which is perfect if you’re about to apply a lighter palette. However, for darker paint, you’ll have to apply several primer layers for an even finish.
Regardless of how you paint your IKEA furniture – via spray, mini-roll, or brush – it will be there to stay as long as you’ve done proper preparations.
- If you paint with brushes, you’ll have to put in extra effort to take care of brush marks.
- Spray guns often cause a dusty finish.
Once you’re done and the primer has dried off, apply one last round of gentle sanding by using any medium-high grade sandpaper. The goal here is to fix any defects, bumps, irregularities, or other issues. As long as you keep things gentle and keep your primer out of harm’s way, everything will be okay.
It is important to use the right primer for the right type of surface and paint. Make sure you thoroughly read what the product labels have to say.
Use a latex primer for latex paint and an oil-based one for oil-based paint. If you plan to finish with polyurethane, then you should apply an oil-based finish with oil-based paint and water-based finish in case you’ve chosen latex paint.
There is a widespread rumour that mixing oil-based and latex paint is impossible. Truth be told, that’s not absolutely wrong. To have oil paint over a latex primer is a no-no, but using latex paint over oil primer will actually work.
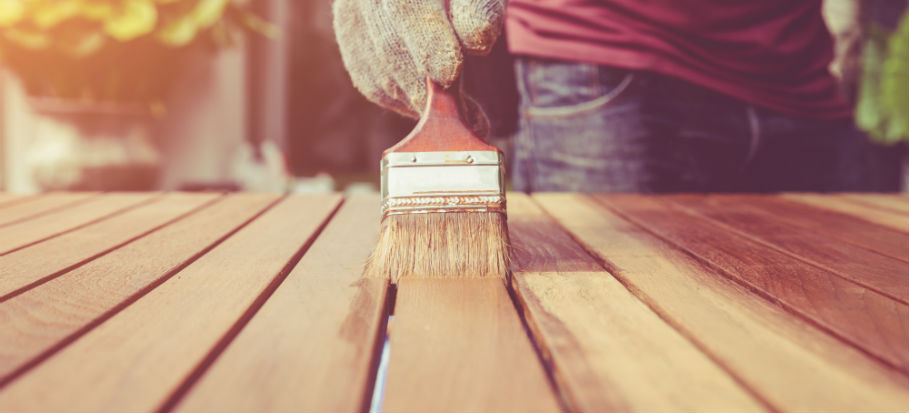
Step #4: Apply paint:
Before we proceed, it’s important to once more stress on the fact that, if you do not key nor properly prime your furniture, you’ll surely regret the results.
Tips for painting IKEA furniture:
- Use gloss or eggshell paint over regular emulsion to achieve a better finish.
- Mind how temperature and humidity can affect the paint or primer drying off time.
- Follow label instructions down to the last word. It is better to wait a bit longer and let everything dry properly than to rush a re-coat and end up regretting your decision. This is also known as curing. It may take anywhere from a few days to a few weeks, depending on your climate.
- To play on the safe side and wait is always better than to rush and regret.
Stick to these tips and success will follow, otherwise, the paint will most likely chip off from the slightest of knocks or from something as silly as placing a hot cup of coffee. If you are doing this in a carpeted room and some of the paint has splashed over the carpet, don’t worry – here is how to remove paint stains from carpeting.
Step #5: How to seal your newly painted IKEA coating?
Sealing your IKEA unit after repainting it is crucial to keeping the pleasant and glossy feel of the finish.
Did you use eggshell paint? If so, then a top coat of sealer can do a great job for your finish. While there a are quite a few types of poly-sealants out there, products that will help you fully finish painting your IKEA furniture can be both oil-based polyurethane and water-based polycrylic sealers.
Polyurethane vs. Polycrylic Sealants – Which One Should You Use to Coat Your IKEA Furniture?
The first one is proactive and comes in both oil and water-based varieties, as well as in glossy or satin finishes.
Oil-based sealants tend to turn yellow as they age. Although this is true for most products, water-based products do have a few advantages of their own. They won’t cost you the hustle and nerves to both apply and clean. Water-based sealants have a faint odour and are far less toxic compared to their counterparts. They also take less time to dry, compared to oil-based sealants.
Water-based sealants would be a better choice for painting IKEA furniture, but you should consider the alternative as well. Oil-based polyurethane behaves better when exposed to extreme temperatures, compared to option #2.
Regardless of which option you’ll choose, make sure to test before applying anything to your IKEA piece just so you’re 100% sure you’re happy with the results.
Advantages of Polyurethane for painting
- Adds a shiny touch to your coating.
- Is as close to scratch-proof as possible.
- Obviously more durable in the long term.
Disadvantages of Polyurethane for painting
- Takes longer to dry off – up to 12 hours.
- It is far more toxic.
- It is highly flammable.
Polyurethane tips for sealing your IKEA repaint:
- Apply 2 or 3 coats of sealant.
- Sand the surface gently in-between. Use the highest grade of sandpaper you can get. Anything around 220+ and above will work just fine.
- Dust removal and cleanup are mandatory! Most polycrylic sealers are 100% transparent and any defects or leftovers will become immediately visible.
- Dilute the sealant with mineral spirit and apply the mixture in long, even strokes on your IKEA unit.
- Aim for perfection and even out each drip.
- Use undiluted sealant for the 2nd and 3rd coat and leave the piece to dry for at least 24 hours.
- Once you’re done, use a razor blade to remove any imperfections.
- Brush the final coat within 2 days after applying the last coat.
- Put extra care to each and all steps for your perfect IKEA paintwork!
How about coating your IKEA paintwork via Polycrylic?
It is a water-based type of coating. You can find both high gloss and satin finishes. Usually, you can apply it via either a spray bottle or with a roller.
Advantages of Polycrylic finish
- It is within the affordable range of products.
- It does not require much of a clean-up since it’s water-based.
- It is, in fact, a really durable finish.
- Polycrylic has no tint.
- Clear finish, when dealing with lighter shades.
Applying a transparent coat of satin polycrylic is often close to unnoticeable and will benefit the wellbeing of your IKEA paintwork in the long term.
Disadvantages of Polycrylic finish
- Far from consistent – it’s often tricky to apply.
- Dries faster than you would want it to – an obstacle for painting large IKEA units.
- Has a milky feel if you add too many coatings on darker paintwork.
Polycrylic works great over regular latex. Unfortunately, we can’t say the same for matte latex. The compounds of matte paint keep the otherwise “fast drying” polycrylic from doing so. This means that you may end up with cracks when everything dries off.
Basic tips to apply a polycrylic finish to your IKEA rework:
- Sand the surface gently.
- Apply a thin layer!
- Sand gently once more.
- Follow up with another 2 layers of coating.
Step #6: Fit your IKEA unit where it belongs.
Step #7: Step back and enjoy the fruits of your work!
Need a professionals’ help for painting?
Book your appointment today!
Takeaways
- You need to prime and prepare your items before painting them.
- If possible, paint your furniture before you assemble it.
- Make sure to sand the surface to give the paint a better base to stick to.
- Use an oil-based primer for oil paint and a water-based one for acrylic/latex paint.
- Always read the paint label and give the coat enough time to dry before reapplying.
- What sealant you use will depend on the type of paint and the kind of finish you wish to achieve.
***
Now you know how you can paint IKEA furniture! Feel free to share your own tips below in the comments.
Image source: iMoved Studio/shutterstock.com